The topic of today is to create a drop-down list in Excel. In this article the plan is to learn how to set up a drop-down list in Excel and how to use it.
The use of Excel spreadsheets can be both easier and more efficient by setup and use of drop-down lists. With the use of drop-downs users are allowed to pick items from a list of predefined values. Easy and it secures correct data in certain fields where this is important.
Setup drop-down list in Excel
Find our example file under the Excel icon above, this is the file that is used during the explanation bellow.

- The first thing we did after creating the workbook was to go to the sheet dataset and make one new heading in column “D” called “Genre”.
- The second task was moving the cursor to field “D2”.
Then it is time to make the drop-down list.
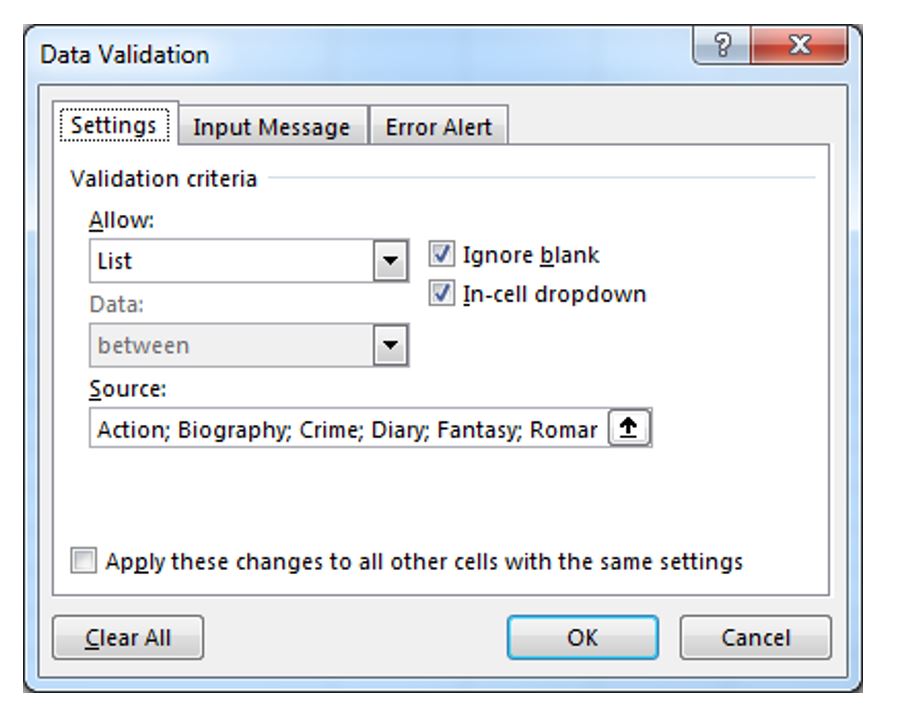
- Then we selected [Data] in the top menu and then [Data Validation] in the sub-menu.
- from the Pop-Up menu “Data Validation” we selected “list” under [Allow].
- After that we typed in some book genres separated with semicolon (;) in the field [Source].
The last step to create the drop-down list is to press the [OK] button.
Test the drop-down list
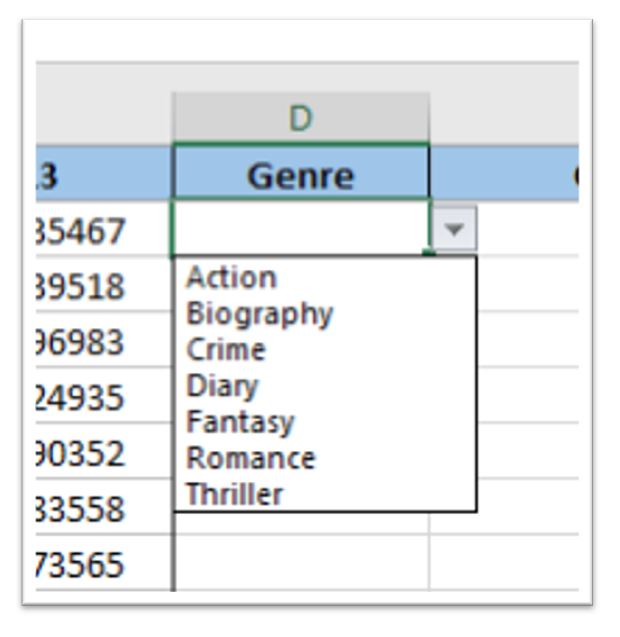
- Then we tested that it worked by pressing the down arrow button next to the field “D2”. When pressed all genres typed in should appear.
- Now it is just to press [Ctrl] + [C], mark the rest of the rows for column D where there is a book and press [Ctrl] + [V]. All fields should now contain a drop-down list.
Now it is your turn to try it! Download our file under the Excel icon above and try it out.
More tips and tricks on Office-Tips.net….
Move entire rows & columns in Microsoft Excel
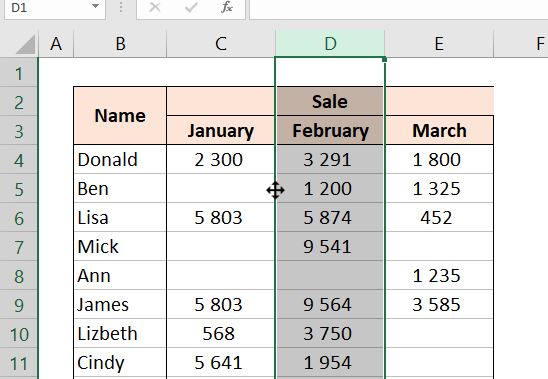
One function that certainly is handy to know is how to move entire rows or columns in Excel. Easily done by drag and drop to the new position.
Stop fussing around when there is need to reorder rows or columns. Use our quick and neat method to drag and drop rows or columns.
Click here to learn a smooth way to drag and drop rows and columns to a new position.
Unhide everything or parts of the data in a spreadsheet.

There are several methods and ways to unhide rows and columns in Microsoft Excel spreadsheets.
In this article there is an explanation to more options for unhiding data that can be nice to know.
It describes ways to unhide a selection of rows or columns in addition to unhiding everything.
Click here to learn how to unhide everything or just part of the hidden data in a Microsoft Excel spreadsheet.
Office-Tips.net article overview
Do you wish to read more of our articles about office products? To get a full overview of all Office-Tips.net articles it is just to [click here].
If user guidance to Excel is the topics you are looking for. Then it is just to [Click here]. This page shows an overview of all Microsoft Excel related articles.